Addressing breaches in inflatable sleeping surfaces involves a process of detection, preparation, and mending to restore its air-retention capability. This often requires identifying the source of the escaping air, cleaning the affected area, and applying a sealant or patch compatible with the mattress material.
Maintaining the integrity of these portable beds extends their lifespan and reduces waste. A functional air mattress provides a comfortable and convenient sleeping solution for guests, camping, or temporary housing situations. The ability to repair such damage contributes to cost savings and resource conservation, avoiding the necessity to replace the entire unit.
The following sections will outline methods for locating perforations, selecting appropriate repair materials, and executing successful patching techniques, thus extending the usability of the inflatable product.
Repairing Inflatable Sleeping Surfaces
Successful remediation of punctures requires careful assessment and execution. The following tips will improve the likelihood of a durable and effective result.
Tip 1: Locate the Breach Methodically: Immerse the inflated mattress section by section in water to observe for air bubbles. Alternatively, apply a soapy water solution to the surface and watch for bubble formation indicating escaping air.
Tip 2: Clean the Affected Area Thoroughly: Use isopropyl alcohol or a similar degreaser to remove dirt, oils, or residue from the area surrounding the puncture. A clean surface ensures proper adhesion of the patch or sealant.
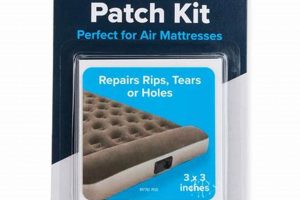
Tip 3: Use Appropriate Patching Materials: The repair material should be compatible with the air mattress’s composition (e.g., vinyl, rubber, flocked surfaces). A vinyl repair kit is often suitable for most standard models.
Tip 4: Cut the Patch to the Appropriate Size and Shape: A circular or oval patch, extending at least one inch beyond the perimeter of the hole, is generally more effective than a square patch due to the absence of corners that may peel.
Tip 5: Apply Adhesive Sparingly and Evenly: Over-application of adhesive can weaken the bond. A thin, consistent layer is sufficient to create a strong seal.
Tip 6: Apply Pressure During the Curing Process: Use a heavy object or clamp to apply consistent pressure to the patched area while the adhesive cures. This promotes a secure bond.
Tip 7: Allow Adequate Curing Time: Follow the manufacturer’s instructions regarding curing time for the adhesive. Premature inflation may compromise the repair.
Adhering to these guidelines can significantly increase the effectiveness and longevity of an inflatable mattress restoration. Careful attention to detail and the use of appropriate materials are essential for a durable repair.
The final section will discuss preventative maintenance measures designed to minimize the risk of future damage to inflatable sleeping surfaces.
1. Identify puncture accurately
The initial step in repairing an inflatable mattress involves precisely locating the source of the air escape. Accurate identification is paramount, as a misdiagnosis leads to wasted effort and a failed repair. An undiagnosed, or improperly located, perforation will continue to release air, rendering the mattress unusable and necessitating further intervention. Examples of accurate identification methods include submerging the inflated mattress in water to observe air bubbles or applying a soapy water solution to the surface and watching for bubble formation at the perforation site. These methods allow direct visual confirmation of the leak’s location.
Without precise identification, the repair process becomes a speculative endeavor. Attempting to seal areas without verifying the presence of damage risks applying adhesives or patches to unaffected areas. This not only wastes resources but also potentially damages the surface of the mattress. Furthermore, inaccurate identification can lead to repeated patching attempts, exacerbating the existing problem and potentially weakening the mattress material surrounding the actual perforation.
In conclusion, pinpointing the exact location of an air leak is a foundational element of the entire repair process. Failure to accurately identify the puncture renders subsequent repair efforts ineffective and may cause further damage. The accuracy of this initial step directly influences the success and longevity of the implemented repair, therefore, it should be prioritized to ensure a functional and durable result.
2. Prepare surface meticulously
Effective repair of an air leak in an inflatable mattress fundamentally depends on the preparation of the surface surrounding the perforation. This stage is not merely preliminary; it directly influences the adhesion and longevity of any repair method applied.
- Removal of Contaminants
Surface contaminants, such as dirt, oil, and residue from cleaning products, can inhibit the bonding process between the mattress material and the patching adhesive. A thorough cleaning with isopropyl alcohol ensures the removal of these substances, creating a clean and receptive surface. In practical terms, neglecting this step might result in a patch that initially adheres but subsequently peels away under pressure.
- Surface Texture and Abrasion
Slight abrasion of the area surrounding the leak, using fine-grit sandpaper, can enhance adhesion by creating a microscopically rough surface. This roughened texture increases the surface area available for bonding and provides mechanical interlock for the adhesive. Without this step, particularly on smooth vinyl surfaces, the adhesive may lack sufficient grip, leading to premature failure of the repair.
- Complete Drying Prior to Application
The presence of moisture, whether from cleaning solutions or ambient humidity, compromises the integrity of the adhesive bond. Thoroughly drying the prepared surface before applying the patch is essential. Residual moisture can create a barrier between the mattress and the repair material, preventing proper adhesion and potentially leading to the formation of mold or mildew under the patch over time.
- Proper Degreasing Techniques
Residues from skin oils and certain cleaning agents can interfere with the adhesive’s ability to form a strong bond. Utilizing a degreasing agent, such as denatured alcohol, effectively removes these oils, ensuring a clean surface for patching. The use of improper cleaning products or the failure to fully remove greases will result in a compromised repair, regardless of the adhesive’s strength.
In essence, the meticulous preparation of the surface surrounding the air leak in an inflatable mattress is not merely a
suggestion, but a critical determinant of the repair’s ultimate success. By eliminating contaminants, enhancing texture, ensuring dryness, and effectively degreasing the area, the foundation for a durable and lasting patch is established, optimizing the likelihood of restoring the mattress to its intended functionality.
3. Appropriate patching material
The selection of patching material directly impacts the success of repairing a puncture. An unsuitable material will not adhere properly to the air mattress, resulting in recurring air loss and negating the repair attempt. Cause-and-effect is clear: using a vinyl patch on a vinyl mattress creates a strong, lasting bond, while using duct tape typically results in temporary or failed repairs. The proper material is a vital component; it ensures a leak-free seal. An example is a flocked air mattress; a standard vinyl patch may not adhere well to the flocked surface, necessitating a specialized flocked patch or the removal of flocking before application.
Further considerations include patch size and adhesive type. A patch that is too small may not adequately cover the affected area, leading to air escaping around the edges. Similarly, an adhesive incompatible with the mattress material will fail to create a secure bond. Practical application requires matching the patch material to the mattress composition and selecting an adhesive recommended for that specific combination. Failure to follow these guidelines will result in a compromised repair, regardless of the care taken in other steps.
In summary, appropriate patching material is crucial for a durable solution. Challenges include identifying the mattress material and selecting a compatible patch and adhesive. This understanding links to the broader theme of mattress repair by emphasizing the importance of using the right tools and materials for the job. Using unsuitable materials will lead to recurring problems, regardless of the user’s patching skill.
4. Apply sealant carefully
The application of sealant represents a critical phase in the effort to restore the air-retention capabilities of an inflatable mattress. The efficacy of this step hinges on precision and adherence to established techniques.
- Volume Control
An excessive volume of sealant introduces several complications. Overapplication can saturate the surrounding material, potentially weakening the structure and prolonging the curing process. Excess sealant might also create a sticky residue that attracts dirt and debris, compromising the integrity of the repair. Conversely, insufficient sealant fails to establish a robust seal, resulting in persistent air leakage. A measured approach, utilizing a volume commensurate with the size of the perforation, is therefore essential. Practical examples involve employing precision applicators or carefully spreading the sealant with a small tool to ensure uniform coverage without excess.
- Uniform Distribution
Uneven distribution of the sealant can create weak points within the repaired area. Areas with insufficient sealant remain vulnerable to air escape, while areas with excessive sealant are prone to cracking or peeling as the material ages. Uniform application ensures a consistent barrier against air leakage and distributes stress evenly across the repaired area. Techniques to achieve uniform distribution include using a fine-tipped applicator to apply sealant in a circular motion or employing a spreader to create a smooth, even layer.
- Avoidance of Air Pockets
Trapped air pockets beneath the sealant can compromise the bond with the mattress material. These pockets not only reduce the surface area available for adhesion but also create pathways for air to escape. Careful application techniques, such as slowly applying the sealant and gently pressing it into the perforation, help to minimize air entrapment. Examples include using a roller to smooth out the sealant and eliminate air pockets or employing a vacuum sealing technique to ensure complete contact between the sealant and the mattress surface.
- Edge Sealing
The perimeter of the sealant application is particularly susceptible to peeling or lifting if not properly sealed. Thoroughly sealing the edges prevents moisture and debris from infiltrating the repaired area, extending the life of the repair. Techniques for edge sealing include carefully feathering the edges of the sealant to create a smooth transition with the mattress material or applying a secondary layer of sealant along the perimeter for added protection.
These considerations illustrate the interconnectedness of precision and longevity in the repair process. Skillful application, considering volume, distribution, air pockets, and edge sealing, determines the ultimate success in restoring air mattresses. By adhering to these principles, the restoration process is enhanced, extending the service of the inflatable product.
5. Proper curing time
The efficacy of any attempt to repair an air leak in an inflatable mattress is inextricably linked to allowing sufficient time for the applied sealant or adhesive to fully cure. Premature use, before the curing process is complete, subjects the newly formed bond to stress, increasing the likelihood of bond failure and a recurrence of the leak. This cause-and-effect relationship underscores the importance of adhering to the manufacturer’s specified curing duration. For instance, a vinyl patch applied with adhesive requires a curing period, often ranging from several hours to a full day, for the adhesive to achieve its maximum bonding strength. Rushing this process almost invariably results in a compromised seal.
The chemical processes involved in curing necessitate this period of inactivity. During curing, the adhesive undergoes polymerization, forming strong cross-links that bind the patch to the mattress material. External pressure or inflation during this critical phase disrupts the formation of these bonds, weakening the overall repair. The practical implication of this understanding is that patience and adherence to the recommended curing time are as important as the selection of appropriate patching materials and the meticulous preparation of the surface. Failing to allow sufficient time negates the positive effects of all prior efforts, rendering the repair temporary at best.
In summary, proper curing time is not merely a procedural formality but a fundamental component of a successful inflatable mattress repair. Neglecting this step undermines the integrity of the repair, leading to premature failure and necessitating further intervention. Understanding the underlying chemical processes and the impact of external factors during curing highlights the practical significance of this often-overlooked aspect. Challenges to observing proper curing time, such as immediate need, can be mitigated through planning and temporary alternatives, ultimately ensuring a more durable and cost-effective repair.
Frequently Asked Questions
This section addresses common inquiries regarding inflatable mattress repair, offering guidance on techniques and best prac
tices.
Question 1: What are the primary causes of air mattress leaks?
Punctures from sharp objects, abrasion against rough surfaces, seam separation due to stress, and degradation of the material over time are frequent causes.
Question 2: How can the location of a small leak be accurately identified?
Submerging the inflated mattress section by section in water and observing for air bubbles is a reliable method. Alternatively, applying a soapy water solution to the surface and watching for bubble formation at the perforation site proves effective.
Question 3: Is it possible to repair a leak near a seam?
Repairing a leak near a seam presents a greater challenge due to the increased stress and complex structure. Reinforcement with a fabric patch and flexible adhesive is often necessary.
Question 4: What type of adhesive is best suited for patching an air mattress?
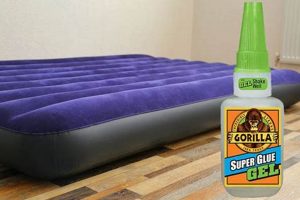
Adhesives specifically formulated for vinyl or rubber, depending on the mattress material, are recommended. Cyanoacrylate-based adhesives (super glue) may be used with caution but can make future repairs difficult.
Question 5: How long should the adhesive or sealant cure before re-inflating the mattress?
The curing time varies depending on the adhesive used. Adhering to the manufacturer’s instructions is essential; typically, a period of 24 hours is recommended to ensure a complete bond.
Question 6: Can an air mattress with a significant tear be effectively repaired?
While minor punctures are easily addressed, significant tears may compromise the structural integrity of the mattress. The effectiveness of the repair depends on the size and location of the tear, and professional repair or replacement may be necessary.
Proper repair and maintenance are essential to extend the lifespan of inflatable mattresses.
The next section explores preventative measures to minimize the risk of future leaks and damage.
Conclusion
This exploration has provided a comprehensive overview of how to fix leak in air mattress, emphasizing identification, preparation, material selection, precise application, and curing procedures. Successful remediation of these punctures and tears hinges on a systematic approach, incorporating appropriate materials and diligent execution. Adherence to these established methods ensures extended product lifespan and user satisfaction.
The information presented serves to empower individuals with the knowledge to maintain and prolong the usability of inflatable sleeping surfaces. By understanding the principles outlined, consumers can reduce waste, minimize expenses, and optimize the functionality of this common household item. Consistent application of these techniques contributes to both economic and environmental sustainability.


